Do you want to ensure that your parts are durable and wear-resistant? Trust our specialists. At SECO/LAB, we conduct comprehensive tests on carburized parts (and more), providing you with reliable information about their quality.
How do we assess the effects of carburizing in our lab?
Determining the Effective Case Depth (ECD)
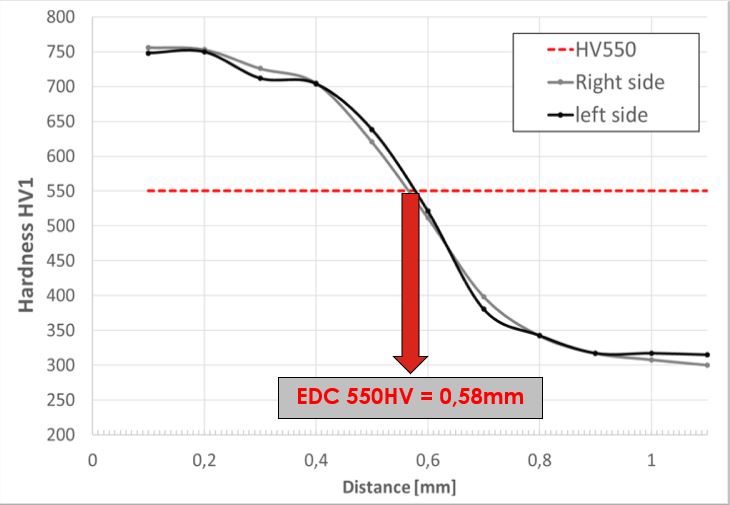
The Effective Case Depth is a key parameter defining the carburized layer. It indicates the distance from the surface to the point where a specified hardness level (usually 550HV1) is achieved.
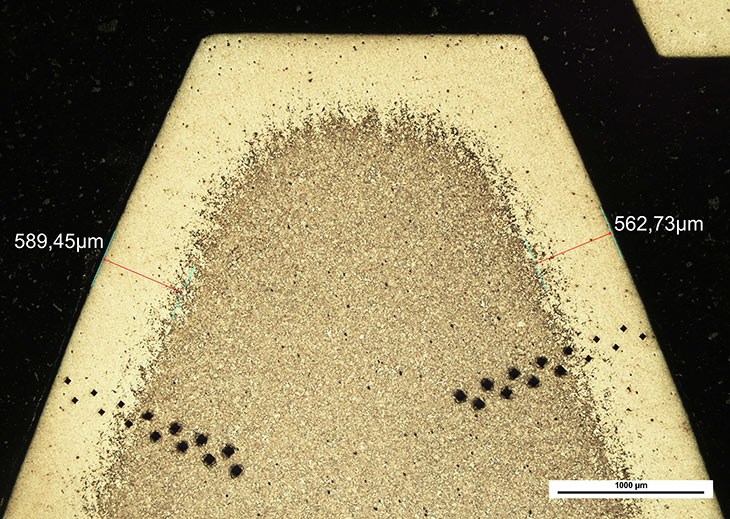
At our SECO/LAB metallographic laboratory, we use the advanced Struers DuraScan hardness tester to measure ECD. This fully automated device, equipped with precise optics, creates indents on the cross-section of the prepared and embedded sample. Based on hardness data from the indents and their distance from the surface, we generate a hardness-depth profile. The intersection of the hardness criterion line with the hardness curve determines the ECD value, as shown in Fig. 1. It’s worth mentioning that the results correspond with microstructural analysis findings (Fig. 2).
Fig. 1. The determined Effective Case Depth (ECD) value for one of the gear teeth.
Fig. 2. The Effective Case Depth (ECD) value determined using an optical microscope. The results are consistent with the measurements taken on the hardness tester.
Additionally, the Struers DuraScan hardness tester, with its advanced features, enables fast and fully automated measurements, allowing for the precise determination of ECD values across the entire working area of the sample, and analysis of process repeatability. This aspect can be crucial for validating your process.
Determination of Surface Hardness
Surface hardness determination is a quick measurement that does not require complex sample preparation. We typically use Rockwell scales (HRC and HRA) and Vickers scales (from HV5 to HV10), depending on the thickness of the layer being examined.
Determination of Core Hardness
Although core hardness does not directly characterize the carburized layer, it provides valuable information about the overall strength of the component, and the conditions of the hardening process.
Microstructural Analysis
Microstructural analysis is performed using the Nikon Eclipse LV150 optical microscope, equipped with a set of objectives (up to 1000x magnification), a high-resolution Nikon DS-Fi3 camera, and the NIS Elements image analysis software. To assess the effects of the carburizing process, we can analyze:
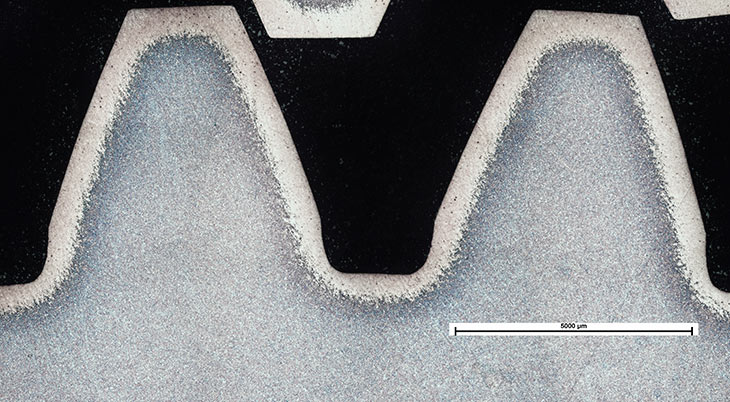
Uniformity and Consistency of Carburizing (Fig. 3)
Fig. 3. Structure of Gear Teeth – Analysis of the Uniformity and Consistency of the Carburized Layer
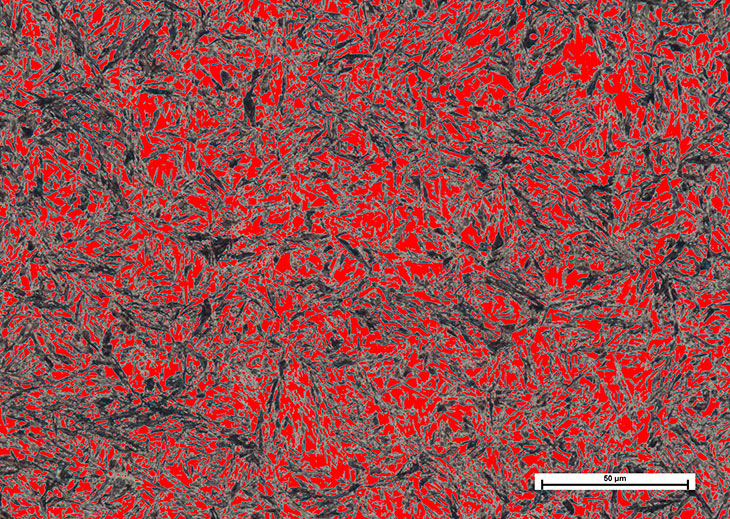
Residual Austenite Content and Carbide Precipitation (Figs. 4 and 5)
Fig. 4. Measurement of Residual Austenite Content in the Case-Hardened Layer
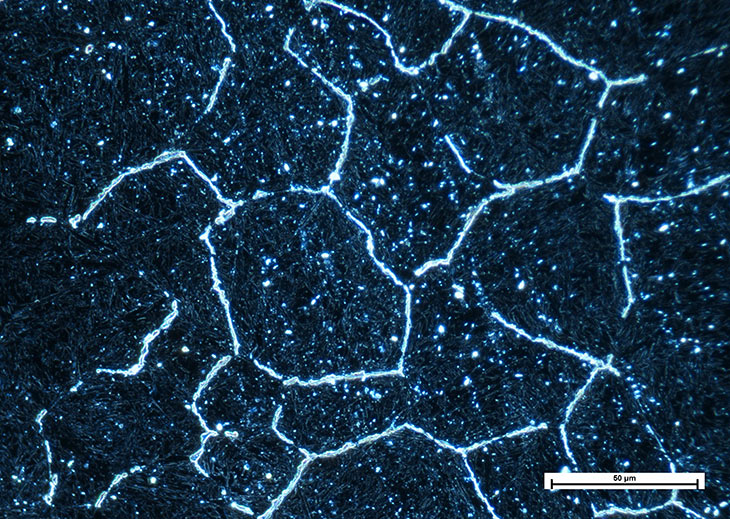
Fig. 5. Carbide Precipitations at Grain Boundaries – Image Taken in Dark Field
Grain Growth and Presence of Non-Martensitic Transformation Products (Figs. 6 and 7)
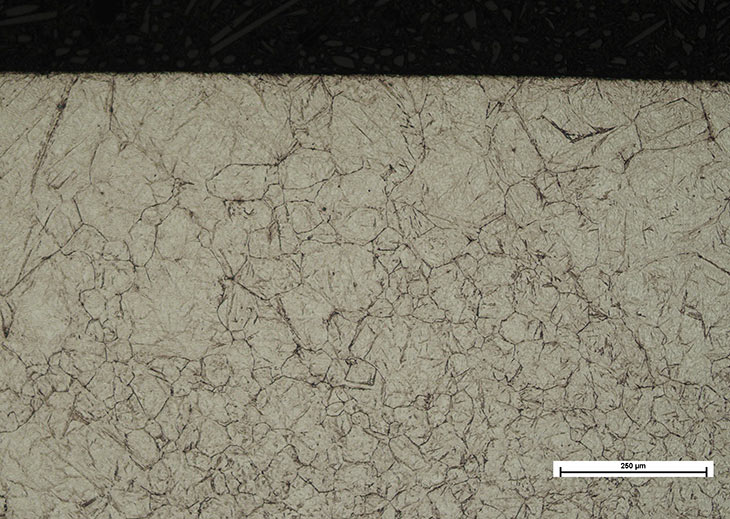
Fig. 6. Abnormal Grain Growth Caused by Excessively High Process Temperature
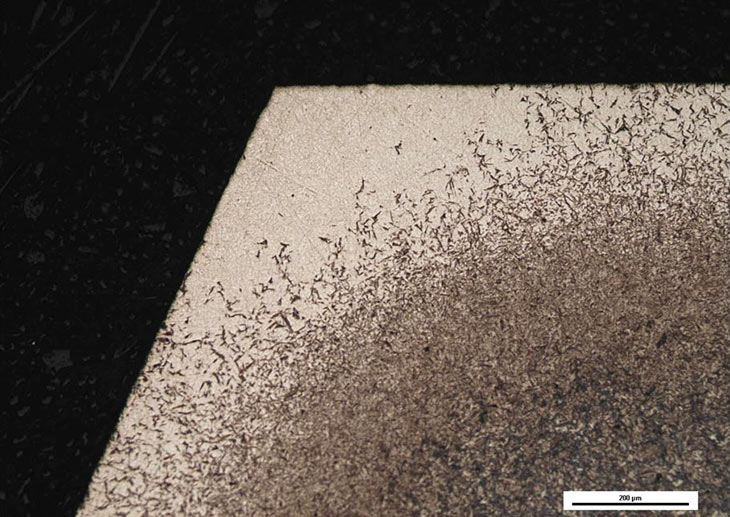
Fig. 7. Non-Martensitic Transformation Products Present in the Carburized Layer
Invest in the Future of Your Products. Our advanced metallographic analyses will provide you with essential insights to evaluate process results and confirm the quality of your production.
